By Steve Bush 10th January 2023
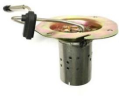
I got given a 5kW heater for the workshop, powered by diesel fuel and colloquially known as a ‘Chinese diesel heater’ (right) – they seem to be based on designs from German companies Webasto and Eberspacher. Engine Coolant Heater

I finally got around to installing over the cold snap before Christmas, putting the heater unit inside the workshop (right) and the exhaust, air intake, fuel tank, pump and fuel filter outside.
Disclaimer and safety note: What you do to your diesel heater is your affair. If you don’t know what you are doing, get an expert to fit and set-up such heaters. Do your own flammability risk assessment before making anything that will be operated as part of a heating system. End note
It produces lots of warm air inside (but see ‘adjustment’ below) but sadly produces lots of noise outside – too much to be a good neighbour.
Prototype inlet silencer attached to a cupboard covering the fuel tank and pump, and the less successful exhaust silencers (which still need mounting….)
The sound comes from the heater’s combustion chamber, where a second fan whips the burning flame into a bit of a frenzy – think mini blast furnace – with sound emerging from both the hot exhaust pipe and the cool combustion air inlet pipe.
Looking around the web, noise seems to be a common problem with these units. Many folk have posted ways to quieten this, and I join their ranks today with my take on removing inlet noise, and work-in-progress on exhaust noise.
The inlet noise has been completely (I claim…) sorted by a home-brew silencer (white vertical tube in photo above) based on a ~450mm length of 68mm downpipe of the type used with domestic guttering, with two 3d-printed adaptors in the ends: one to take the corrugated aluminium tubing supplied to transport inlet air, and the other (right) to accept the simple muffler (and insect filter?, below left) that came with the heater.
Original air inlet muffler/filter makes the open pipe quieter, but nothing like quiet enough
In the new arrangement, this screws to the bottom of the 68mm pipe (top left photo) to keep insects out (if that was its job), but is not needed at all for silencing.
Inside the 68mm pipe is a length-wise ~28mm (inside) diameter tube just shorter than the 450mm pipe, rolled up around a broom handle from ~10mm pitch galvanised mesh.
Damping comes from polyester fluff wrapped around the mesh tube before the mesh tube and fluff were pushed together into the 68mm pipe. When assembled, the end holes line up with the mesh tube to leave a completely-open central air passage.
Probably unnecessarily, the 68mm pipe has a 3d printed baffle (left) inside to split the internal length into two unequal parts – to help prevent resonance (a guess), with all the internal surfaces ,ade conical (another guess) to further soften resonant tendencies.
My unit arrived without any sort of exhaust silencer, just the corrugated stainless steel pipe seen in the top left photo.
To this I first added a cheap visual (but not functional) copy of a Webasto exhaust silencer (bottom left in photo right). This has a straight-through hole from end-to-end surrounded by a spring stretched from end to end.
Some folk speculate that this spring has some resonance-suppressing effect, but it looks to me that it is intended to keep back glass fibre wadding that was not included before the outer halves were welded together.
Next I added the recently-available ‘upgrade’ muffler (upper right in photo right), available for ~£20 online, which made much more of a difference. Adding both as in the picture (connected by a wrap of aluminium cut from a drinks can and two Jubilee clips) makes it much quieter than the open pipe, but not silent.
The construction of this ‘upgrade’ muffler is interesting. The housing is a rectangular aluminium extrusion and the ends (hardly visible) are identical aluminium castings. Inside is an S-shaped air path defined by two S-shaped perforated half-tubes, also cast from aluminium. Unlike the first filter, this one does have glass fibre wadding wrapped around the outside of the perforated tube.
After installation, even with the standard pipes, the heater must be set-up – a process which I have yet to fully understand.
Analogous to adjusting a carburettor or fuel injection, it requires the fuel-air mixture to be set at different fan speeds ( I believe the heater’s internal computer interpolates for intermediate settings).
As far as I can tell, the best method is to use a carbon monoxide meter, and it needs to be done initially as well as when changes are made to burner-side inlet or exhaust arrangements. It appears that some units come approximately set-up, and others are not set-up at all.
This adjustment is done through the same electronic control panel as setting the fan speed or thermostatic temperature for normal heating use, but it is not the same thing. Not adjusting the finished installation properly could mean excessive CO production, particulates (soot) in the exhaust, internal clogging, internal over-heating, excessive fuel consumption, unexpected flame-outs or low heat output.
If anyone knows where there are clear written instructions for this adjustment, please comment below and I will put a link here.
Tagged with: EinW Engineer in Wonderland heat workshops
I recommend an army surplus tent heater. They are simple Franklin stoves that run on Diesel fuel. They have a stove pipe for ventilation. No electronics required. No moving parts.
Morning Fast Eddie Nice idea, but I wanted the flame outside the workshop – which I did not achieve, but at least the flame in what is installed only has access to air from the outside – so less chance of a fire if something flammable is spilled inside the workshop.
Steve the tuning of these heaters is important, not very difficult, but seems like a thing of mystery and complication when you read instructions or are a first timer. YouTube has a lot of well intentioned instructional videos that show the process and it’s a good medium for showing rather than describing which in this task is useful.
It appears the presets in these machines are often not very good and can result in all the problems you describe.
The principal is to get the air fuel ratio right at the lowest speed and the highest speed so the six heat bars stay on with both settings. If you run it too lean it will drop down to five bars which is not optimal.. As you say, the controller adjusts the in between settings on a linear basis.
Once you enter the setup code of 1688, a process you will get down pat very quickly as you do it multiple times, the settings are displayed, and can be adjusted, in the order of pump speed low in hertz, pump speed high in hertz, fan speed low in rpm, fan speed high in rpm. For what it’s worth, my settings for a 5kw heater work well on 1.2hz @1500 rpm and 3.0hz at 3500rpm. At these settings I get plenty of heat, minimal CO measured at the exhaust which smells clean, plus enough heat on the lowest setting to keep my caravan warm enough on the lowest setting to run all night. Others talk about not running the fan too hard as it will wear out and maybe if you have to run the fan at 5000rpm on full speed with 5 hz pump speed then you need a larger unit. I am not clear on what is internally different between the 2kw, 5kw and 8kw etc units. Running the fan lower also results in less noise from the intake.
I’m not so sure a CO meter is required as the heat bars on the controller do an adequate job of showing when you have gone too low.
Once the settings have been changed, you need to leave it on low or high to check the heat bars after a few minutes as it takes time to settle down.
Settings that didn’t work on mine included: 1hz and 1500rpm – went down to five bars 5hz and 5000rpm – smelly exhaust, heaps of heat and intake noise. 1.2hz and 2000rpm – went down to five bars as there was too much air. Reducing to 1.2hz and 1500rpm worked. So there is a bit of trial and error, always working on reducing the fuel as much as possible whilst retaining the volume of heat you require at the air outlet either felt by hand or heat measuring device.
It takes time, set aside an hour. Perhaps less if the controller, inlets and outlets are all visible and easily accessible for measuring. A temp gauge and CO meter are helpful, but not essential. Recheck that the heater fires up to six bars after sitting overnight.
I trust this is a little useful
Thanks Tim That is excellent help As it happens, I recently tried the CO meter and it read ’14’ if I remember correctly, and there is soot in the end of the exhaust pipe, so action is required. I am going to print out your instructions and take them down there as a guide 🙂
Your email address will not be published. Required fields are marked *
Get our news, blogs and comments straight to your inbox! Sign up for the Electronics Weekly newsletters: Mannerisms, Gadget Master and the Daily and Weekly roundups.
Read our special supplement celebrating 60 years of Electronics Weekly and looking ahead to the future of the industry.
Read the Electronics Weekly @ 60 supplement »
Read the first ever Electronics Weekly online: 7th September 1960. We've scanned the very first edition so you can enjoy it.
Read the very first edition »
Keep up with developments relating to space technology - satellite technology, PNT, thermal imaging, SatIoT, spaceports and more
View our busy aerospace section »
Read our special supplement celebrating 60 years of Electronics Weekly and looking ahead to the future of the industry.
Read the Electronics Weekly @ 60 supplement »
Read the first ever Electronics Weekly online: 7th September 1960. We've scanned the very first edition so you can enjoy it.
Read the very first edition »
Keep up with developments relating to the Internet of Things (IoT) - Industrial IoT, sensors, Edge AI, battery technology, SatIoT and more
View our popular Internet of Things section »
Diesel Air Parking Heater By using this website you are consenting to the use of cookies. Electronics Weekly is owned by Metropolis International Group Limited, a member of the Metropolis Group; you can view our privacy and cookies policy here.